This week there's a new series of Maddie's Do You Know on CBeebies to interest my eldest, and one of the episodes (several are on iPlayer if you're in the UK) is about electric cars and wind. He was fascinated by both parts of the programme, and Maddie had some nice simple demonstrations of why wind blows. He asked to watch it a second time, and I sat with him sending a few work-related emails whilst we watched. Suddenly he asked if we could do what Maddie was doing (making a weather vane) and there was no reason why we couldn't...
He obviously wanted to do it the exact moment the programme finished, giving me very little time to figure out which materials we had to hand, so it ended up a little improvised, but it worked! To make the weather vane itself we used:
- An empty jam jar
- Two plastic drinks straws with the bendy bit cut off
- A triangle and square cut from a corrugated cardboard box
- A scrap of paper big enough to cover the top of the jam jar
- An elastic band
- A small amount of play dough
- A pin
We slit one straw at both ends with scissors and inserted the triangle and square at opposite ends to form the arrow pointer. This points in the direction the wind is coming from (because the triangle has a smaller area exposed to the wind than the square).
The arrow needs to be able to spin freely, so we put the paper over the top of the jam jar, secured in place with an elastic band and then made a hole in the middle to fit the second straw. We put a little play dough inside the straw at both ends. The play dough at the bottom seemed to weight it down and it didn't wobble as much with it there (we added this later). We found the pivot point of the arrow by balancing it across my son's finger, and then I inserted the pin from top to bottom through the straw (when it wasn't on his finger!). The pin then pushed into the play dough at the top of the other straw, giving a freely spinning, fairly well balanced arrow. You can adjust it slightly by wiggling the triangle or square backwards in the slits that secure them to change the pivot point if you're a few millimetres out from perfect balance.
The next thing we needed was to plot the compass points. We do have a real compass somewhere, but I thought it'd be more fun to repeat an experiment we did last year using magnets to point to the North and South poles. We used two bar magnets on a plastic plate, floating in a bowl of water. The magnets spin the plate freely and indicate the magnetic poles. We used some letters to mark North, South, East and West in the garden (they are lower case, but that's what we had to hand!).
We then removed the bowl of water and put the wind vane in the same position and watched it spin. It wasn't well balanced and the straw supporting it in the jar wobbled, so we made the adjustments mentioned above to make it better balanced. It was quite a windy afternoon, and it pretty quickly showed us which way the wind was blowing from once we'd got it balanced better. We watched it as the wind gusted from slightly different directions.
Maddie also did a demonstration of how warm air expands, and my son insisted we give that a go too. It was an easy setup and I like to let him pursue his interests where it's not unreasonable to do so! I found a glass bottle in our recycling and an unused balloon. I blew the balloon up and let it deflate to stretch it a little - I've found this is useful when doing demos with balloons before as they seem to be easier to inflate a second time. I put the uninflated balloon around the neck of the bottle so that the air inside is a fixed amount because the balloon seals it.
We then got a bowl of hot and of cold water (we used hot and cold from our tap, so probably 60 and 15 degrees Celsius), and put the bottom of the glass bottle in the hot water. My son was concerned it wasn't working like Maddie's, and then the balloon slowly inflated! I think we probably had a smaller bowl of cooler water so it didn't heat the air inside the bottle as quickly as he'd seen on the TV. Anyway, the balloon inflated enough that it stood upwards and he gave it a squeeze. Satisfied that it had worked, he moved the bottle to the bowl of cold water whilst I stopped his brother getting to the bowls (he's learnt the word 'bowl', so the soundtrack to this experiment was repeated shouts of 'bowl' followed by the big one shouting 'it's not yours'!). After a couple of minutes, the balloon flopped down, showing that the volume of the air inside had decreased as the air had cooled. We then left the little one to play with the bowls of water he had been coveting and removed the glass bottle. Later, Daddy was given a repeated demonstration of the experiment, and had it explained to him by the small boy!
All in all, I think most of the learning here was probably done watching the TV, but it was nice to be able to replicate it at home, and it's probably made it more memorable. From a personal perspective, at least Mummy was able to make it work like Maddie so even if I'm not quite as cool as his TV heroine, I can at least 'do science'!
 |
| Finding the compass points |
He obviously wanted to do it the exact moment the programme finished, giving me very little time to figure out which materials we had to hand, so it ended up a little improvised, but it worked! To make the weather vane itself we used:
- An empty jam jar
- Two plastic drinks straws with the bendy bit cut off
- A triangle and square cut from a corrugated cardboard box
- A scrap of paper big enough to cover the top of the jam jar
- An elastic band
- A small amount of play dough
- A pin
 |
| Wind vane in action |
We slit one straw at both ends with scissors and inserted the triangle and square at opposite ends to form the arrow pointer. This points in the direction the wind is coming from (because the triangle has a smaller area exposed to the wind than the square).
 |
| Close-up - it was a little wobbly but it worked! |
The arrow needs to be able to spin freely, so we put the paper over the top of the jam jar, secured in place with an elastic band and then made a hole in the middle to fit the second straw. We put a little play dough inside the straw at both ends. The play dough at the bottom seemed to weight it down and it didn't wobble as much with it there (we added this later). We found the pivot point of the arrow by balancing it across my son's finger, and then I inserted the pin from top to bottom through the straw (when it wasn't on his finger!). The pin then pushed into the play dough at the top of the other straw, giving a freely spinning, fairly well balanced arrow. You can adjust it slightly by wiggling the triangle or square backwards in the slits that secure them to change the pivot point if you're a few millimetres out from perfect balance.
 |
| Balloon slightly inflated with the bottle in hot water |
We then removed the bowl of water and put the wind vane in the same position and watched it spin. It wasn't well balanced and the straw supporting it in the jar wobbled, so we made the adjustments mentioned above to make it better balanced. It was quite a windy afternoon, and it pretty quickly showed us which way the wind was blowing from once we'd got it balanced better. We watched it as the wind gusted from slightly different directions.
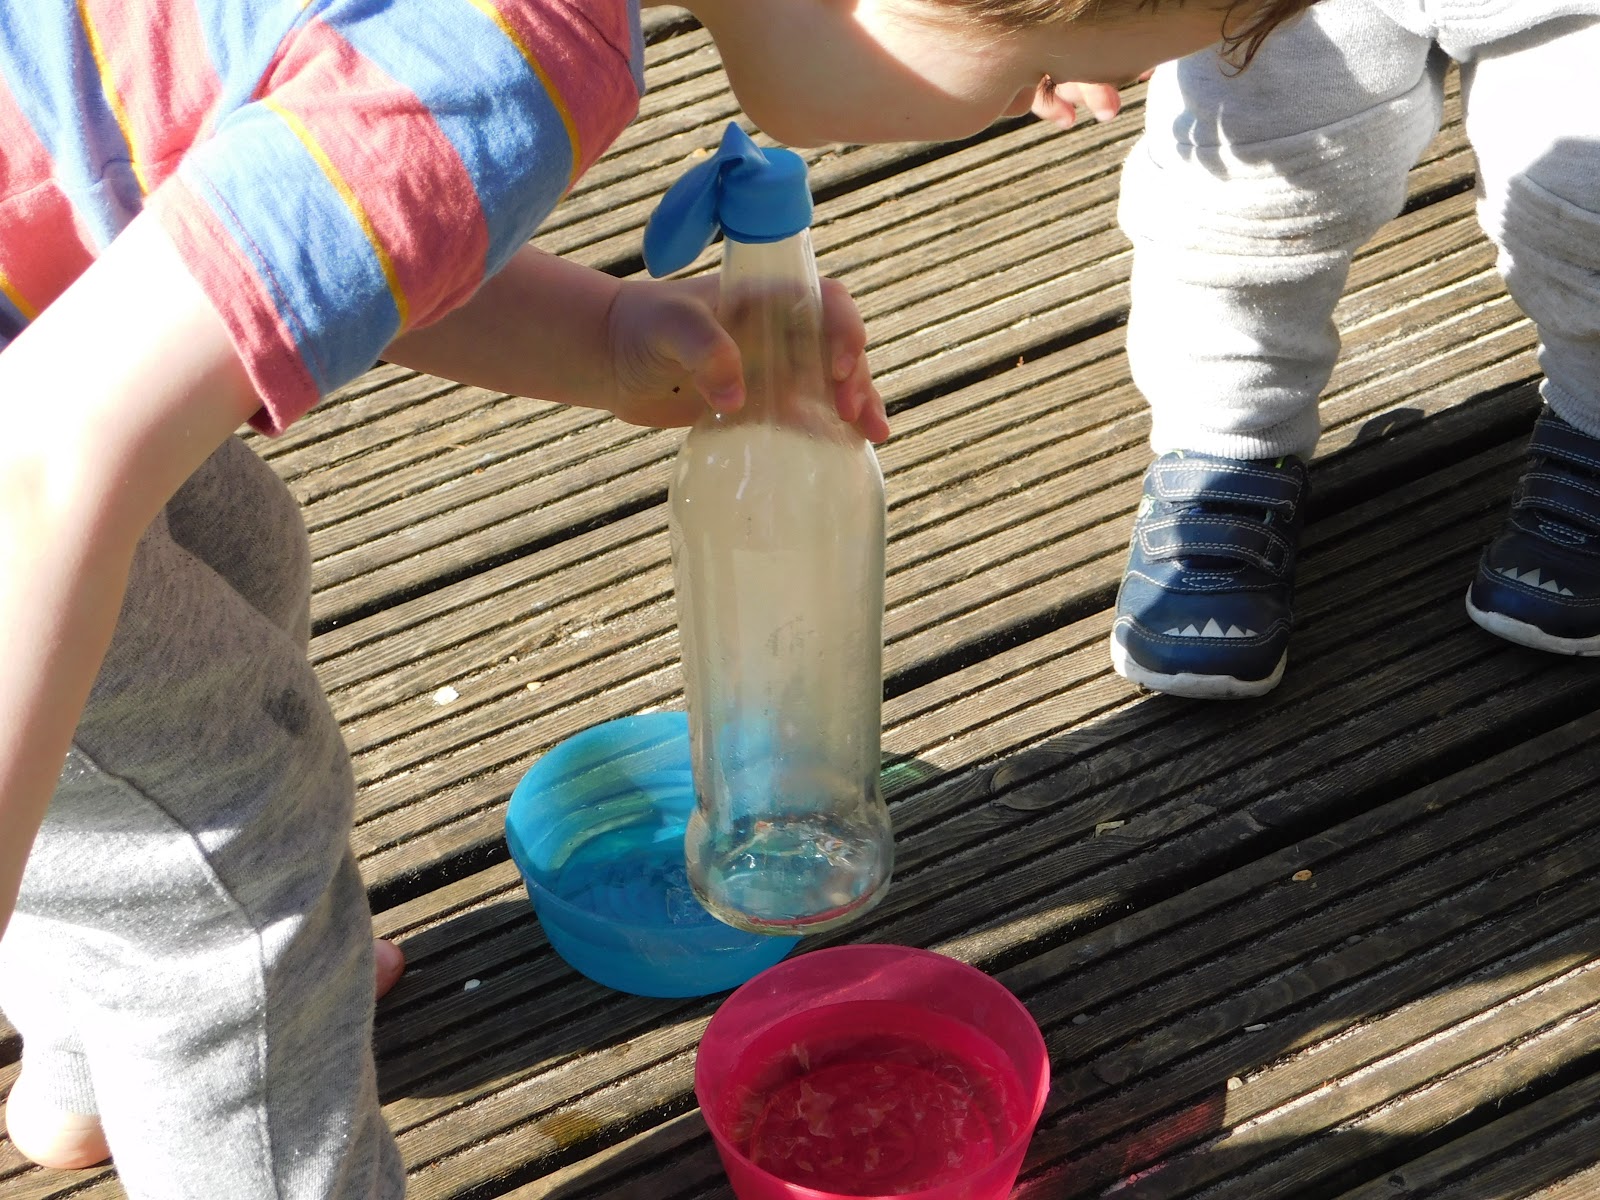 |
| Competition between the experiment and water play with the bowls |
Maddie also did a demonstration of how warm air expands, and my son insisted we give that a go too. It was an easy setup and I like to let him pursue his interests where it's not unreasonable to do so! I found a glass bottle in our recycling and an unused balloon. I blew the balloon up and let it deflate to stretch it a little - I've found this is useful when doing demos with balloons before as they seem to be easier to inflate a second time. I put the uninflated balloon around the neck of the bottle so that the air inside is a fixed amount because the balloon seals it.
 |
| Balloon deflated with the bottle in cold water |
We then got a bowl of hot and of cold water (we used hot and cold from our tap, so probably 60 and 15 degrees Celsius), and put the bottom of the glass bottle in the hot water. My son was concerned it wasn't working like Maddie's, and then the balloon slowly inflated! I think we probably had a smaller bowl of cooler water so it didn't heat the air inside the bottle as quickly as he'd seen on the TV. Anyway, the balloon inflated enough that it stood upwards and he gave it a squeeze. Satisfied that it had worked, he moved the bottle to the bowl of cold water whilst I stopped his brother getting to the bowls (he's learnt the word 'bowl', so the soundtrack to this experiment was repeated shouts of 'bowl' followed by the big one shouting 'it's not yours'!). After a couple of minutes, the balloon flopped down, showing that the volume of the air inside had decreased as the air had cooled. We then left the little one to play with the bowls of water he had been coveting and removed the glass bottle. Later, Daddy was given a repeated demonstration of the experiment, and had it explained to him by the small boy!
All in all, I think most of the learning here was probably done watching the TV, but it was nice to be able to replicate it at home, and it's probably made it more memorable. From a personal perspective, at least Mummy was able to make it work like Maddie so even if I'm not quite as cool as his TV heroine, I can at least 'do science'!
Comments
Post a Comment
All comments are moderated before being published.